Sidebar

Truth EntryGard Replacement How-To | DIY Window Repair

Posted by Ontario Glazing Supplies ,2020 Mar 20th
Truth EntryGard Replacement How-To | DIY Window Repair

Window crank operators break down over time. The drive worm and gears strip, components degrade with exposure to the elements. It's normal! Repairing your Truth EntryGard window operator is a simple, cheap fix that you can perform alone to get your windows back up and operational. This How To will walk you through the tools you need, the steps to follow, and provide some useful tips along the way to help you remove your broken Truth EntryGard dual arm casement window operator from your wood sash window and replace with a new one from Ontario Glazing Supplies. The same steps apply to Vinyl windows with a few improvisations.

Estimated Cost
21 USD
Estimated Time for Repair
10 MINS

Necessary Items

You will need the following supplies and tools to perform this how-to.

Supplies

Tools

DIY Repair Steps

The following steps will guide you through the process of removing your broken Truth EntryGard dual arm window crank operator and installing a new one on a wood casement window. If you have any questions, please feel free to contact us.

Image showing removal of casement window screen | OGS - Ontario Glazing Supplies
STEP 1:

Preparation

Remove any items that might obstruct access to the window crank operator including rolling up window blinds, pushing aside curtains, and/or removing the window screen.
Image showing removal of Truth EntryGard window crank operator handle | OGS - Ontario Glazing Supplies
STEP 2:

Remove window operator handle

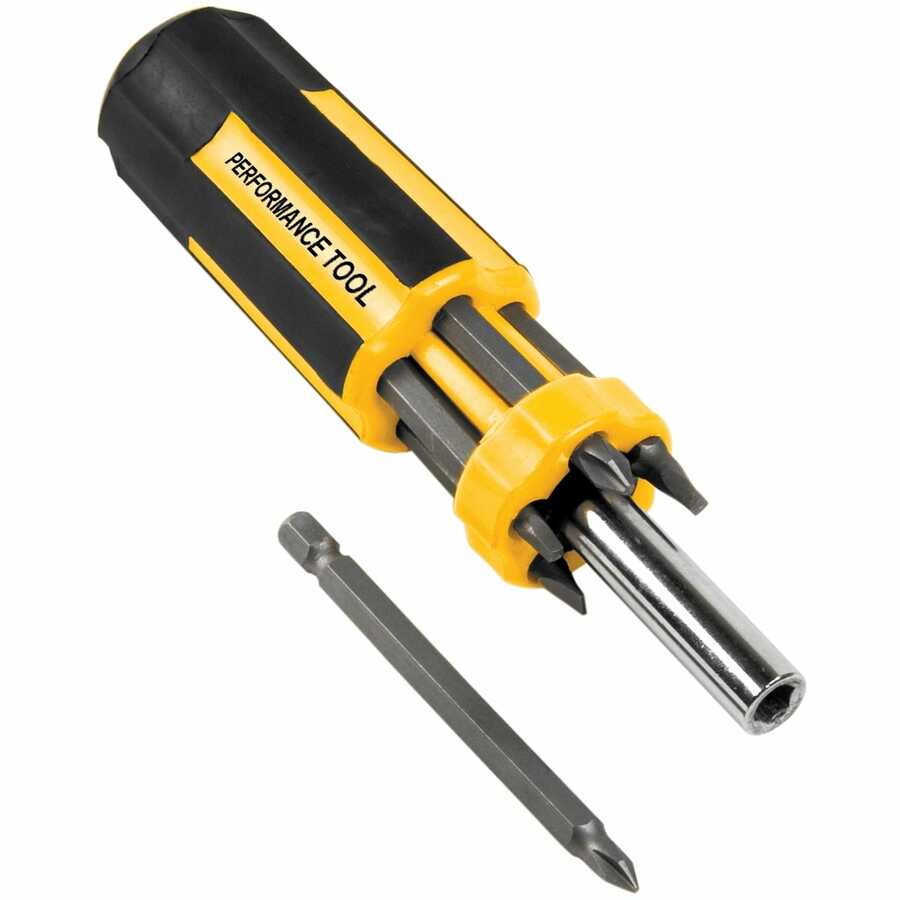
Remove the window crank operator handle. Depending on the handle you have, you may have to unscrew a small set screw at the base of the handle that secures the handle to the operator shaft, this is easily accomplished by turning the handle upwards and using a small flat head bit on the end of your multi bit screwdriver. In other cases, you may just be able to pull the handle off.
Image showing removal of Truth EntryGard window crank operator cover | OGS - Ontario Glazing Supplies
STEP 3:

Remove window operator cover cap

Place the thin side of your painters pry bar between the sill of your window sash and the upper portion of your window operator cover cap and apply a small amount of pressure towards the interior of the room. Remove the Truth EntryGard cover cap and set it aside.
Image showing utility knife scoring a paint line | OGS - Ontario Glazing Supplies
STEP 4:

Score the paint line

Score a line between the bottom sash stop "sill plate" and the sill of your window using a utility knife to separate any dried paint and prevent uneven paint cracking when the bottom stash stop "sill plate" is removed.
Image showing painters pry bar removing bottom sash stop (sill plate) | OGS - Ontario Glazing Supplies
STEP 5:

Remove bottom sash stop

Position the painters pry bar between the window sill and the bottom sash stop "sill plate" inserting it into the score line you created.
Apply gentle pressure upwards and work slowly along the length of the sill plate raising it above the protruding height of the EntryGard window operator. You may encounter exposed finishing nails. Take your time at this step to avoid damaging or breaking the sill plate.
Image showing casement window being opened | OGS - Ontario Glazing Supplies
STEP 6:

Open the window

Ensure the window is unlocked.
Temporarily re-attach the window operator handle to the EntryGard operator shaft.
Simultaneously apply pressure to the frame of the operating window sash (the window that opens and closes) while turning the window handle to simulate opening the window with a normal properly working window crank operator.
Image showing flat head screwdriver being used to release link arm retainer clip from stud bracket post | OGS - Ontario Glazing Supplies
STEP 7:

Release retainer clip from stud bracket post

Insert a flat head screwdriver in the notch on the retainer clip and pull back towards the rivet on the link arm (joint arm) to release the clip from the stud bracket.
Image showing detachment of Truth EntryGard link-arm from stud bracket post | OGS - Ontario Glazing Supplies
STEP 8:

Detach link-arm from stud bracket

Detach the split arm "link arm" from the stud bracket.
Image showing downward pressure applied to roller arm to disconnect roller arm from guide channel track | OGS - Ontario Glazing Supplies
STEP 9:

Detach roller arm from guide channel track

Temporarily re-attach the window operator handle to the EntryGard operator shaft.
Turn the operator handle to align the nylon bushing at the end of the roller arm with the notch on the guide channel track.
Apply downward pressure on the roller arm and pull gently back towards the interior of the room to seperate the nylon bushing from the guide channel and clear the arm from the guide channel track.
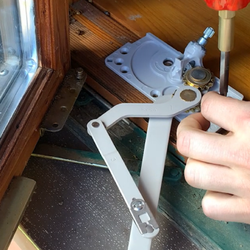
Image showing removal of screws from surface mount Truth EntryGard window crank operator | OGS - Ontario Glazing Supplies
STEP 10:

Remove surface mounted screws

Using your multi bit screwdriver, remove the mounting screws from the base of the Truth EntryGard window crank operator.
Image showing new Truth EntryGard replacement window operator being installed | OGS - Ontario Glazing Supplies
STEP 11:

Install new Truth EntryGard

Install your replacement window crank operator by reversing these steps and you are done!

Video: How To Replace an AmesburyTruth EntryGard Casement Operator On A Wood Window - Complete Tutorial

Learn how to replace a Truth Hardware (AmesburyTruth) EntryGard Casement Window Operator on a wood window from start to finish. This video will walk you through the required tools you need and provide helpful tips and tricks to remove and replace your EntryGard window crank operator.